
MCL3011AYB LED daytime running light (DRL) and LED projector fog light installation guide.
Fitment note: this article follows the 2011–2017 Hyundai Accent product title supplied for publication. The cover of the supplied installation manual identifies Hyundai Accent 2012–2017. Confirm the vehicle year, bumper version and original mounting points before installation.
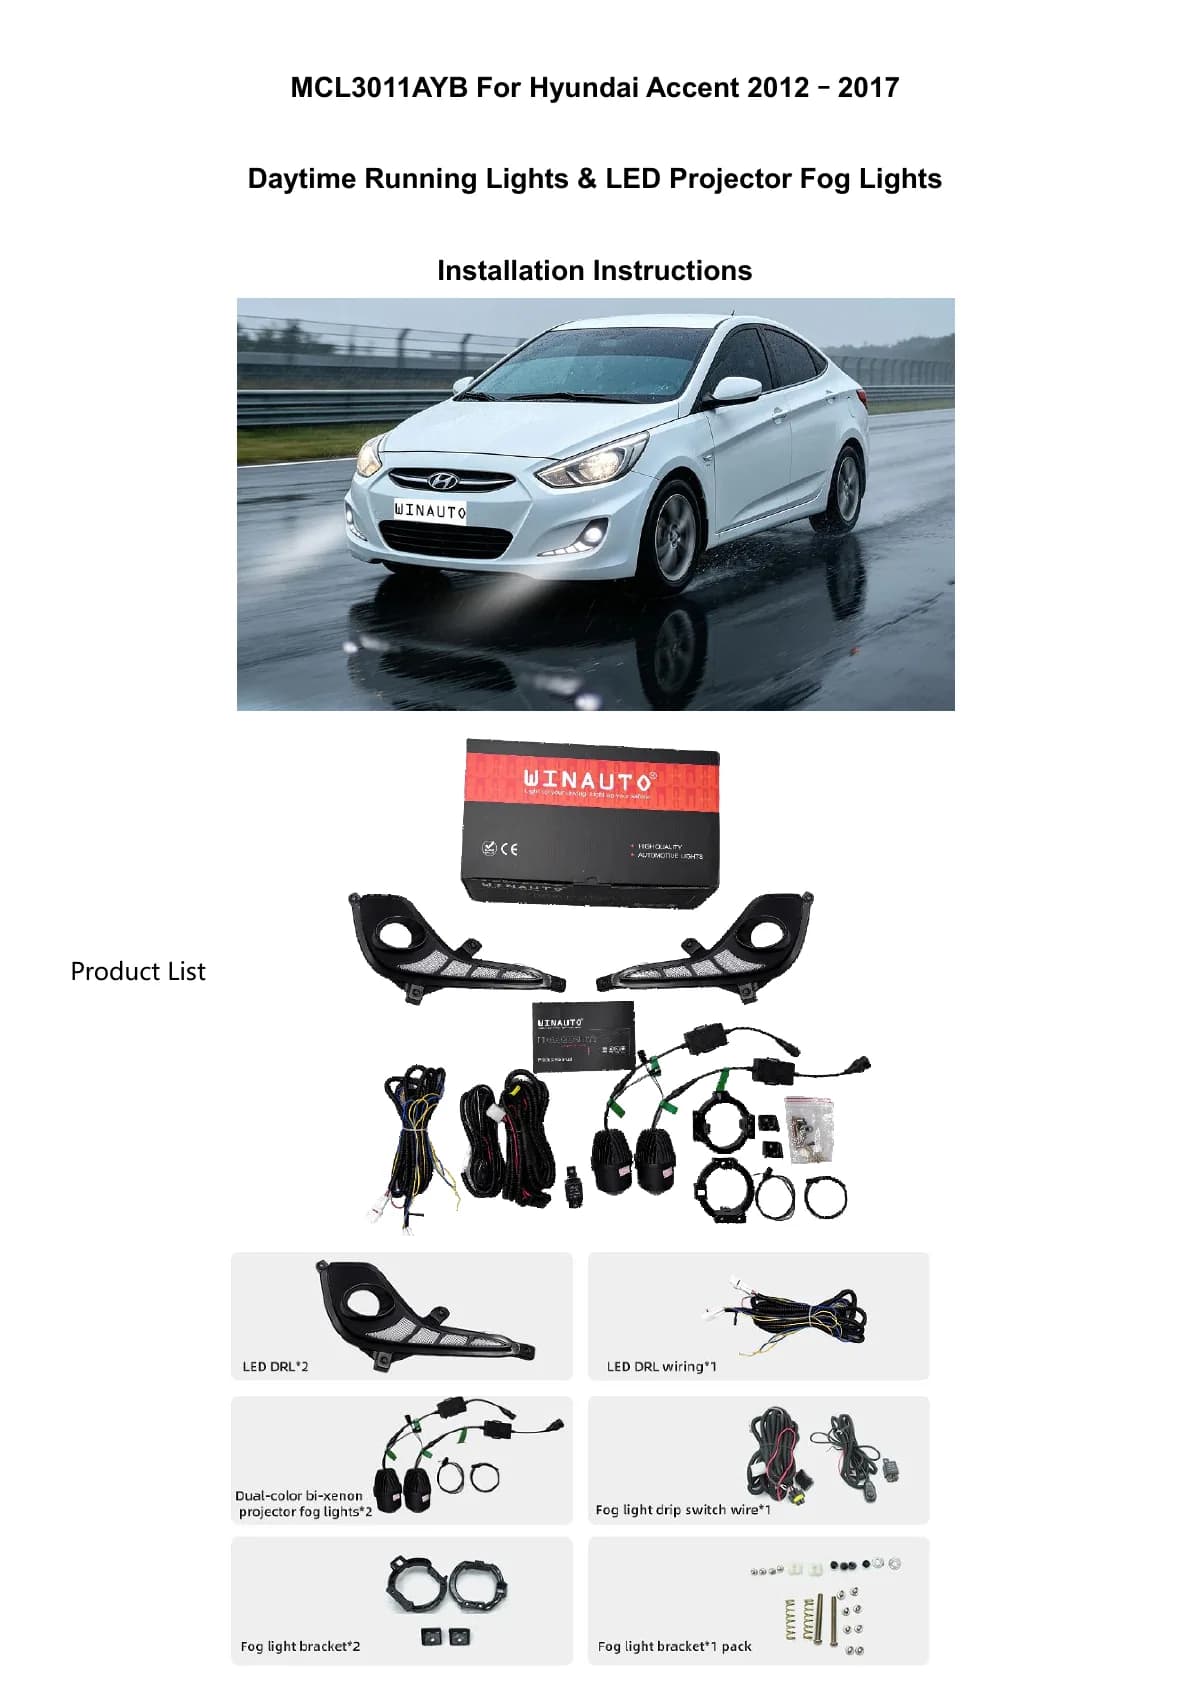
Package overview
The supplied manual shows a pair of LED DRL housings, a DRL wiring harness, a pair of dual-color bi-xenon projector fog lights, a fog-light switch wiring harness, two fog-light brackets and one hardware pack.
Projector fog-light bracket assembly
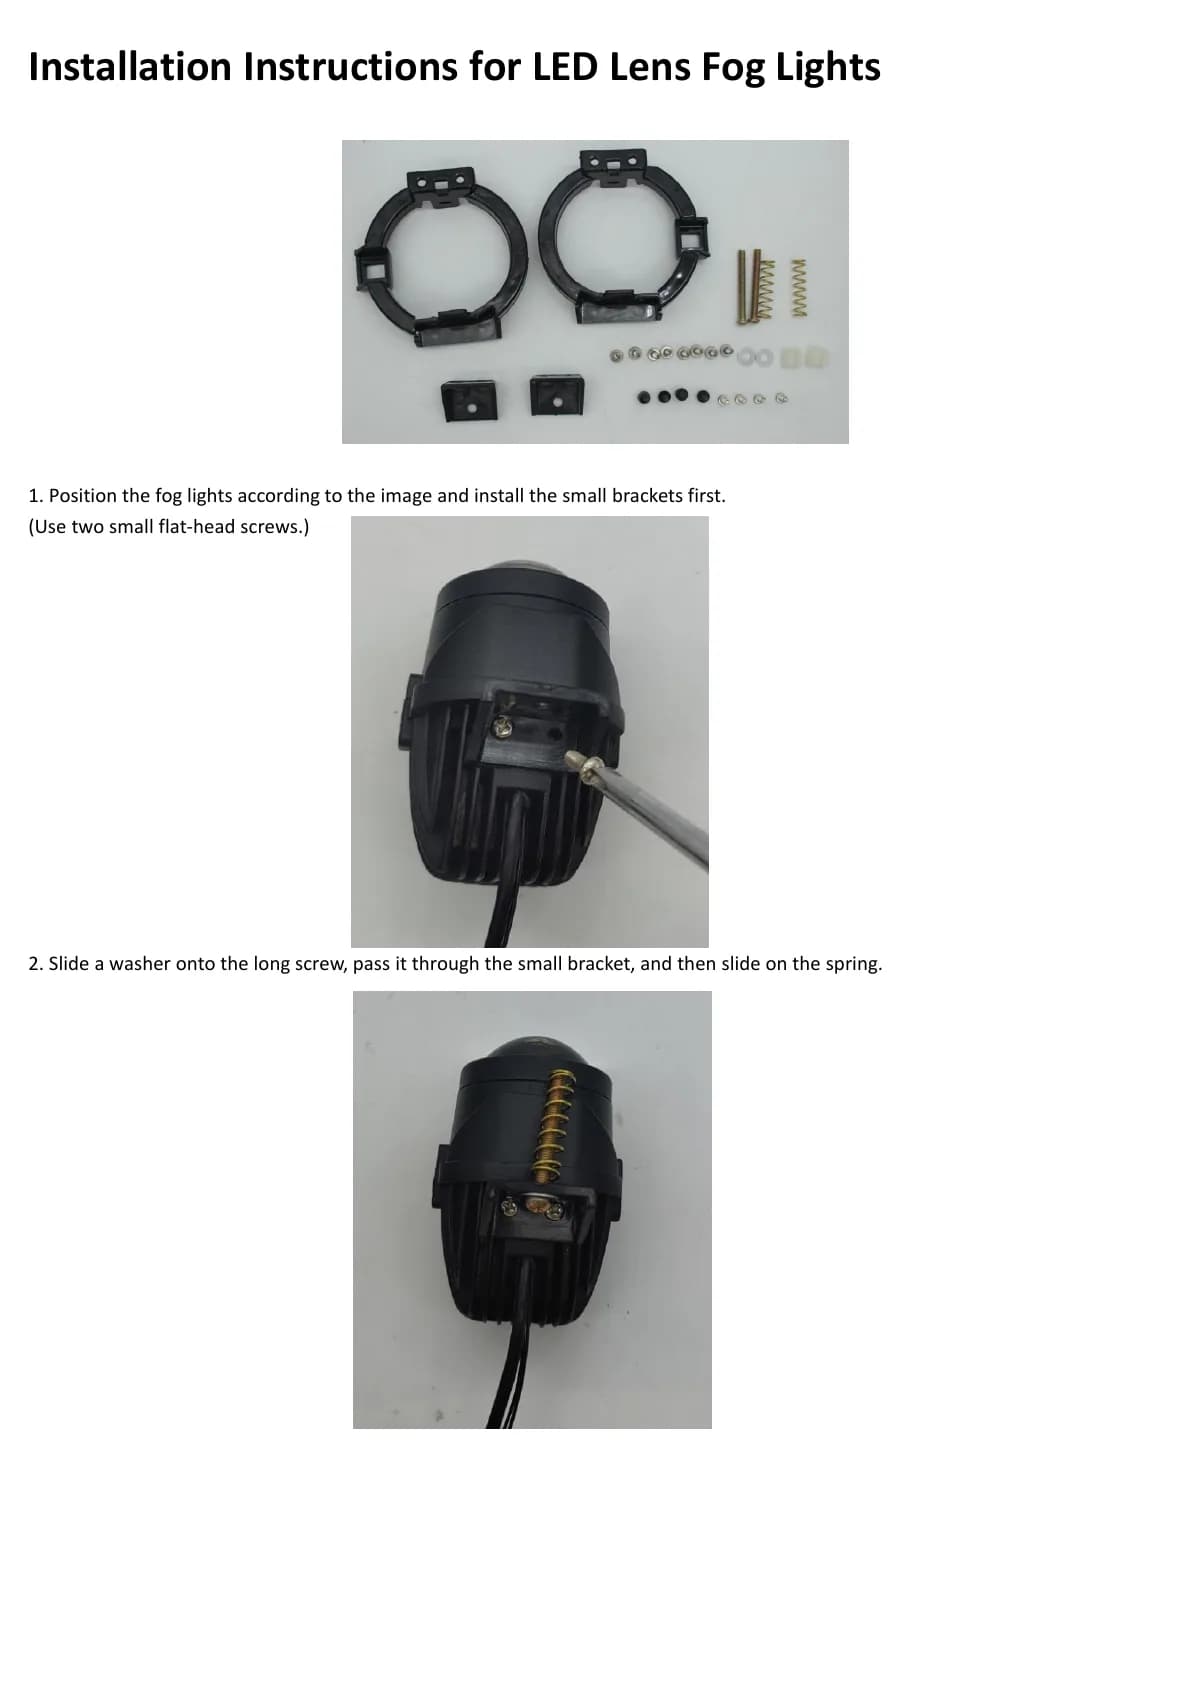
1. Position each fog light as shown in the supplied manual and install the small brackets first with two small flat-head screws.
2. Slide a washer onto the long screw, pass the screw through the small bracket, then fit the spring.
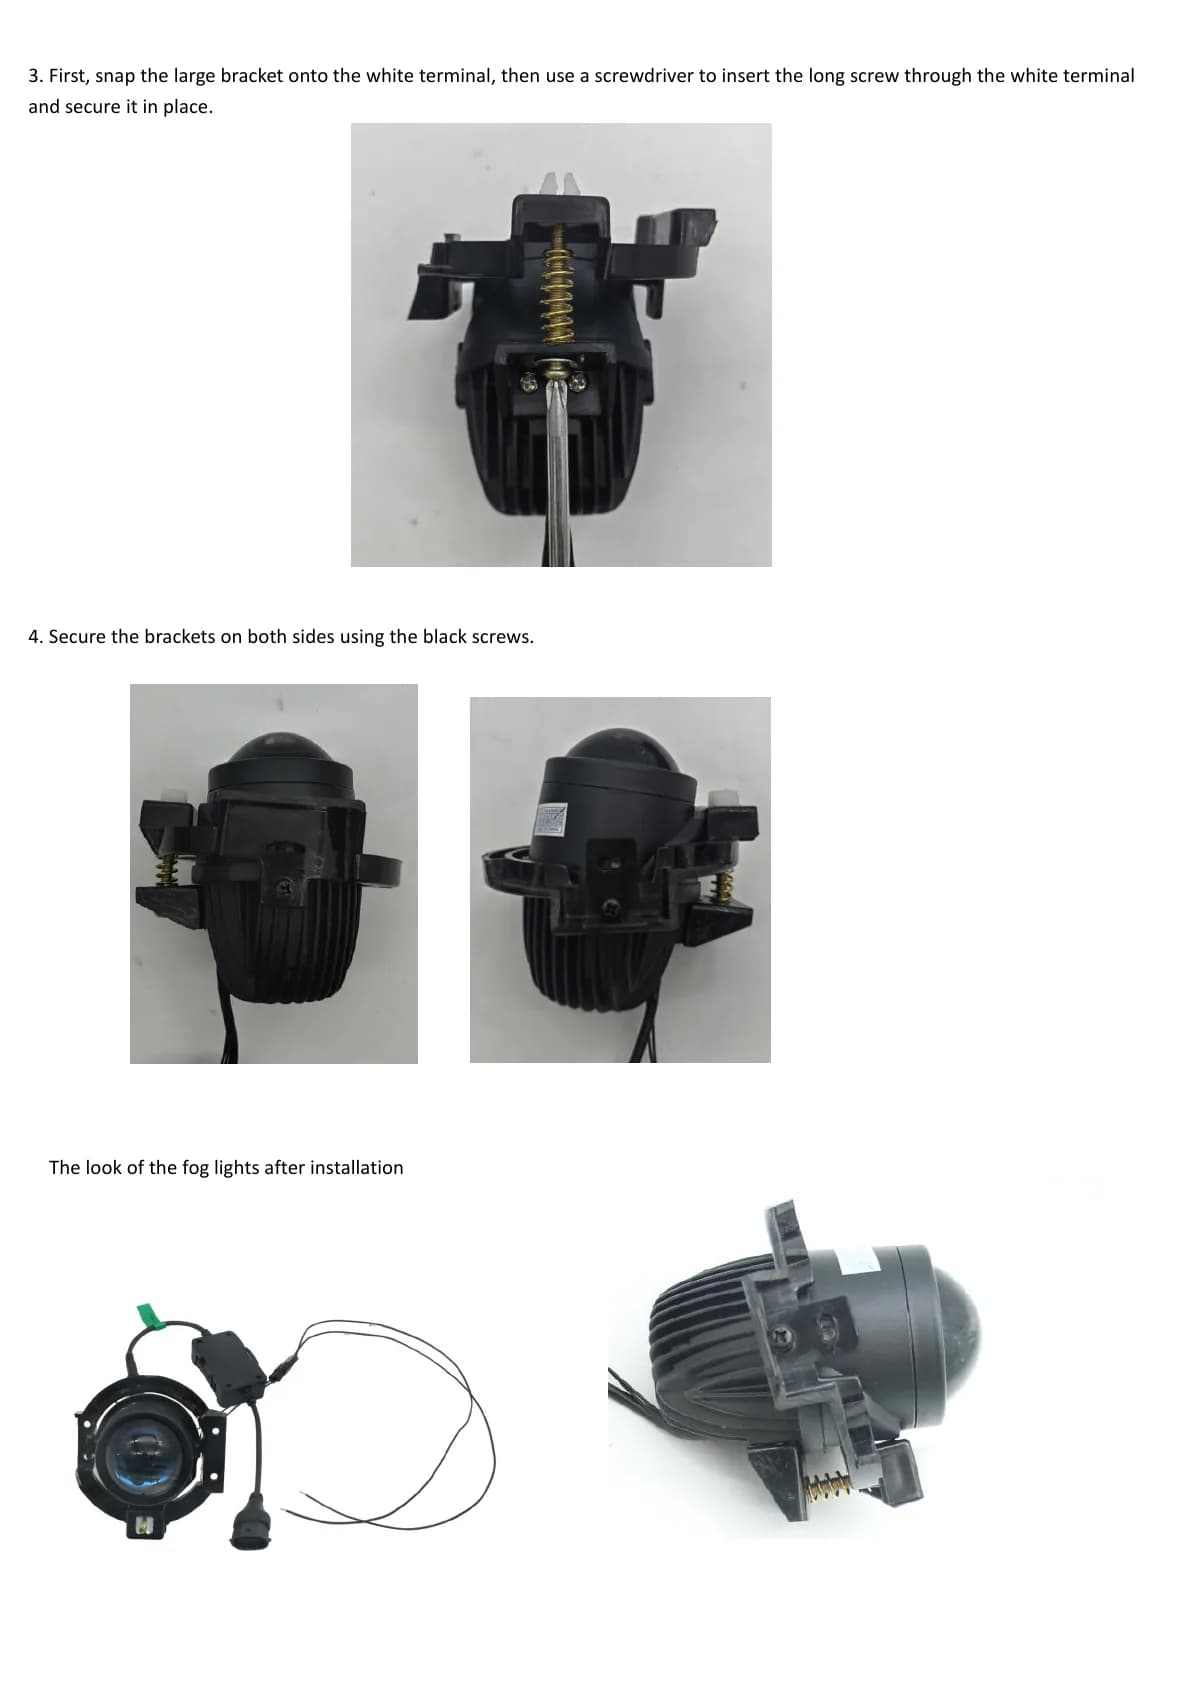
3. Snap the large bracket onto the white terminal. Insert the long screw through the white terminal with a screwdriver and secure it.
4. Secure both sides of the brackets with the black screws.
Install the fog light in the DRL housing
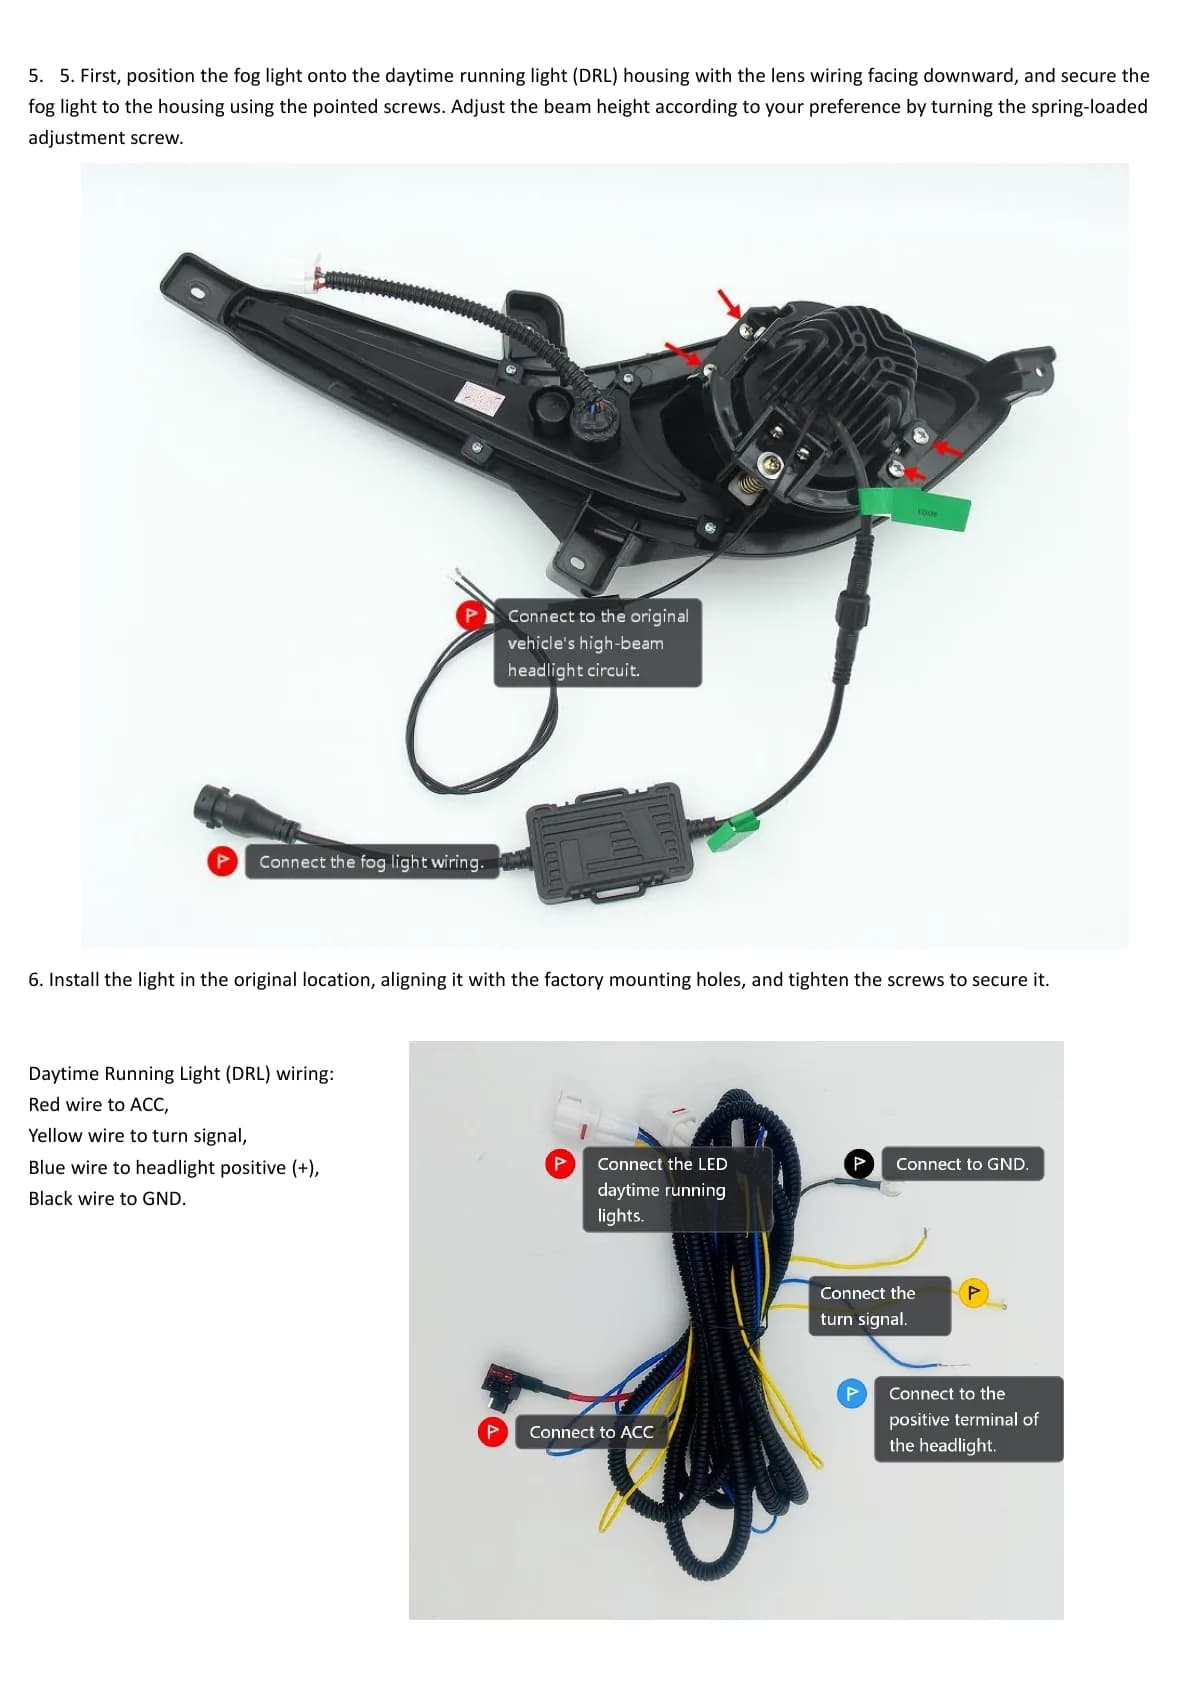
Position the fog light in the daytime running light housing with the lens wiring facing downward. Secure it to the housing with the pointed screws. The spring-loaded adjustment screw is used to adjust beam height. Install the completed lamp assembly in the original location, align it with the factory mounting holes, then tighten the mounting screws.
DRL wiring reference
Red wire: connect to ACC.
Yellow wire: connect to the turn-signal circuit.
Blue wire: connect to the headlight positive (+) circuit.
Black wire: connect to GND.
Fog-light wiring reference
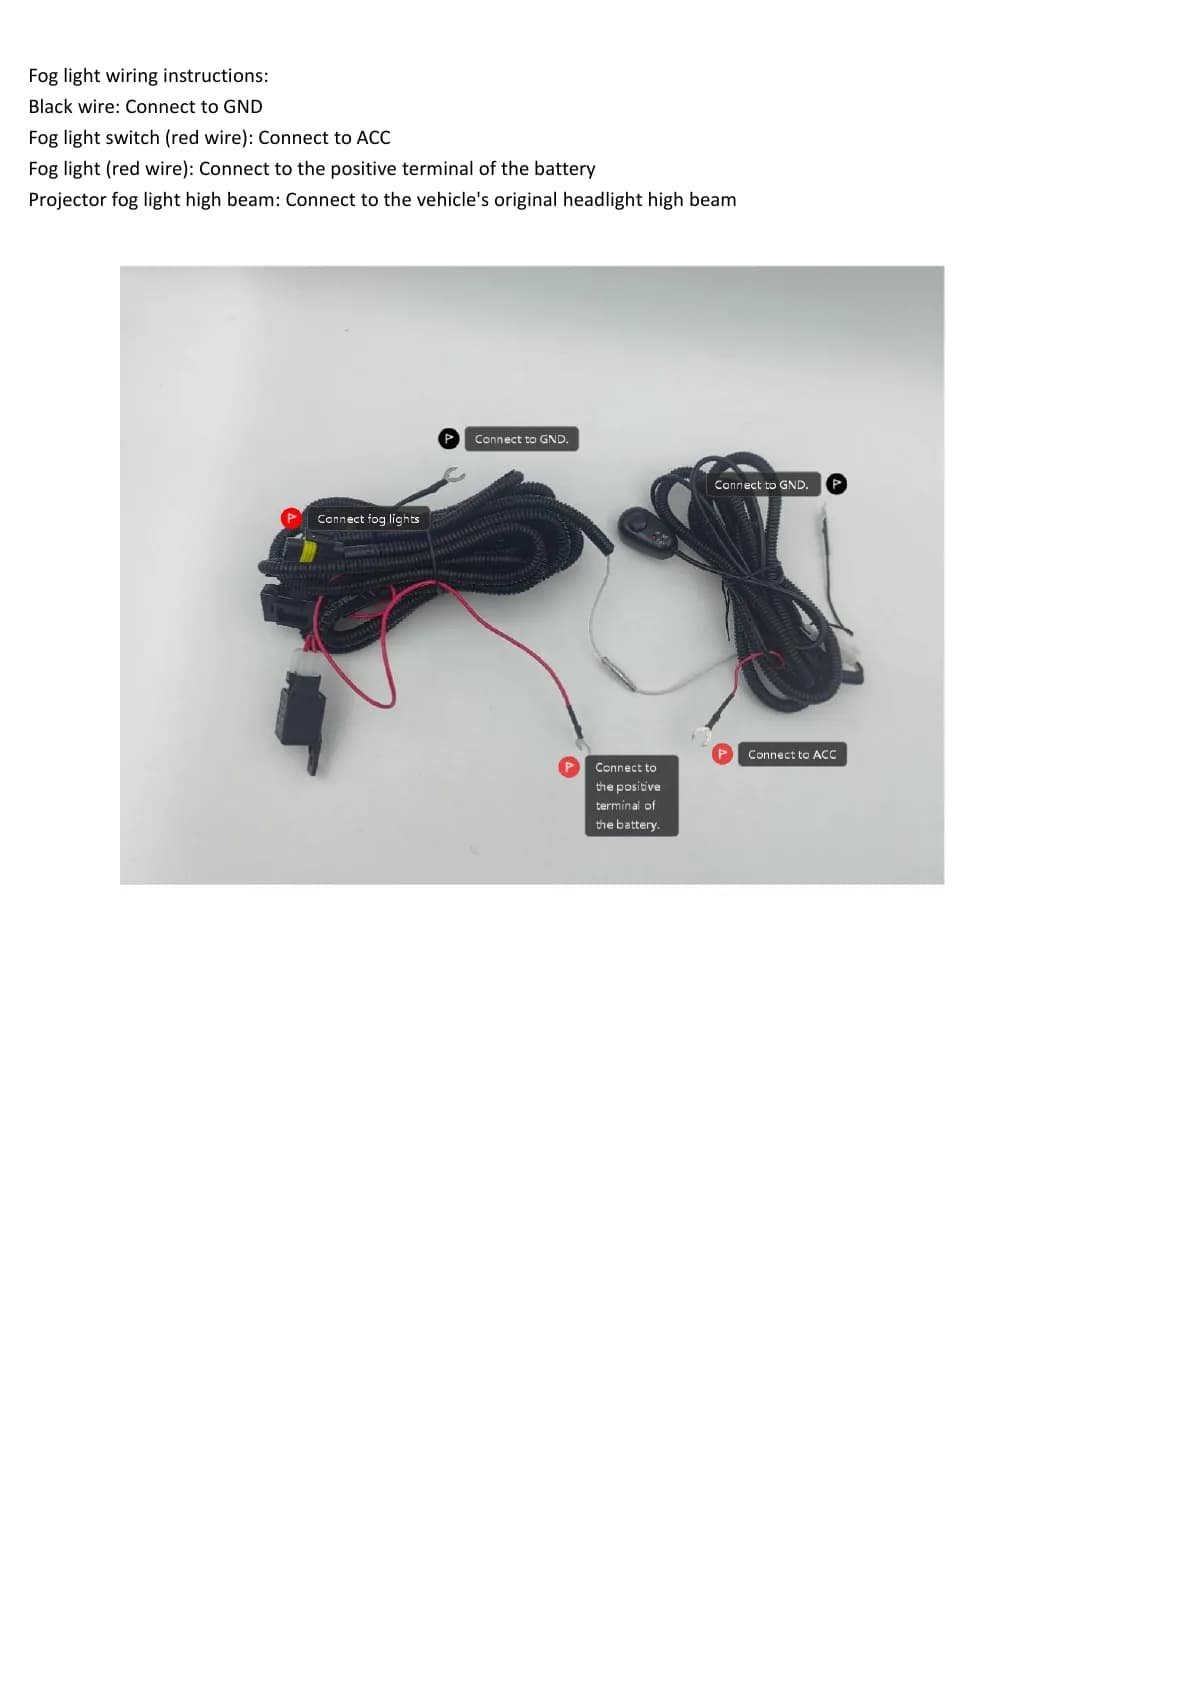
Black wire: connect to GND.
Fog-light switch red wire: connect to ACC.
Fog-light red wire: connect to the positive terminal of the battery.
Projector fog-light high-beam lead: connect to the vehicle's original headlight high-beam circuit.
Installation checks
Before final assembly, check the left and right DRL functions, turn-signal function, fog-light switch function, grounding and beam height. Route and secure all harnesses away from heat, moving parts and sharp edges. If the vehicle wiring or fitment is uncertain, use a qualified automotive-lighting installer.